By Robin Bateman
Disclaimer: If you paint on your binder, please be aware that you will need to spot clean it from now on, as washing may damage your artwork and will stain your binder. We strongly recommend not painting on a binder that you wear regularly. Happy creating!
Whether you want to customise your chest binder for cosplay, create a gender affirming Halloween costume, or just want your binder to feel a bit more you, painting your chest binder is super fun, creative, and pretty simple!
This guide will walk you through the process step-by-step — plus a few dos and don’ts I learned the hard way!
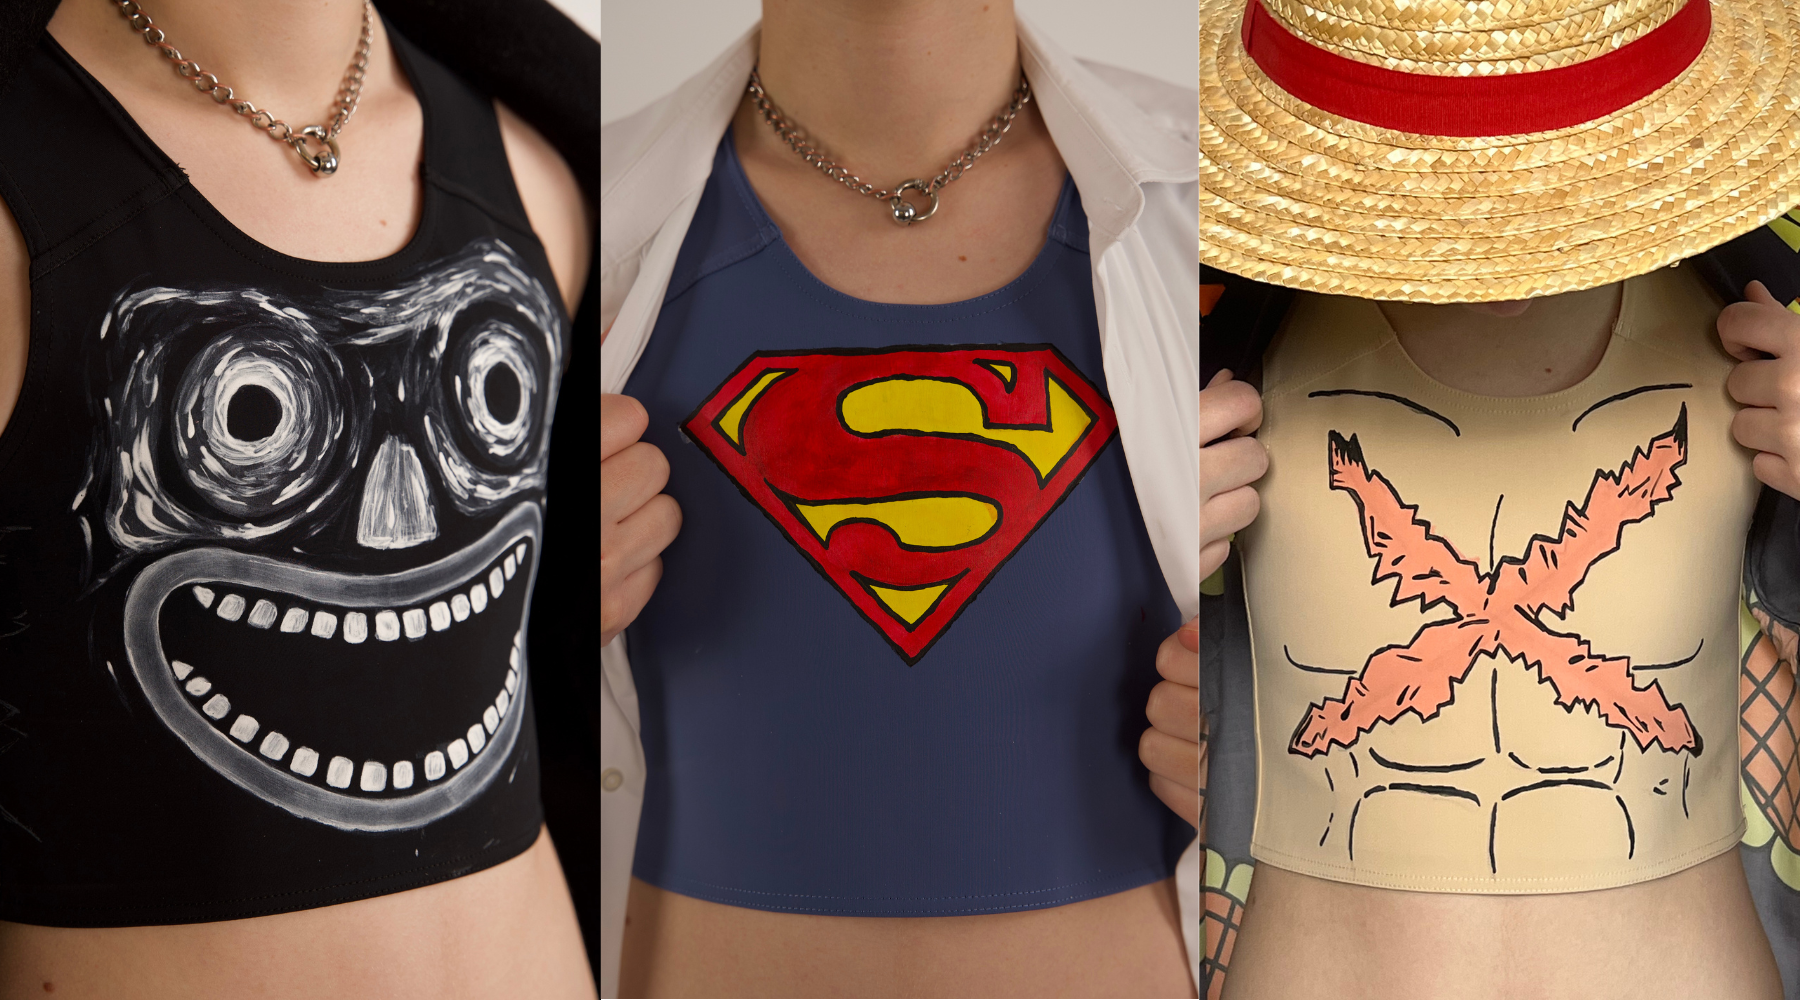
For this guide, I’m using three examples of chest binder cosplays:
- The Babadook – we can’t forget our favourite spooky LGBTQ+ icon.
- Superman – super simple costume, fun for Comic-Con, and a classic. Also, the new movie? I might be a bit too obsessed
- Luffy (One Piece) – for all the weebs! Recognisable, easy, and great if you wish you could cosplay a shirtless character (but haven’t had top surgery).
What You’ll Need

Before we begin, gather your materials:
- Your binder (dark colours work, but light ones really pop!)
- Fabric paint
- Fabric medium (don’t skip this — it makes the paint flexible and the binder washable afterwards)
- Pencils, pens, or chalk (for sketching)
- Masking tape (optional but helpful)
- Paintbrushes
- A hair dryer (for setting layers)
- Reference image or sketch of your design
- Old clothes to paint in! (trust me on this)
Step 1: Choose Your Cosplay or Halloween Design
Start with a character, pattern, or anything else that you’d like to paint onto your chest binder. This can be as simple or complex as you like - sketch your own idea, print out a reference, or pull up an image on your phone or laptop. Think about what you’ll use it for — cosplay? Pride events? The choice is yours.
Step 2: Sketch or Tape It Out

Lightly sketch your design on your chest binder using pencil or chalk. You can also use masking tape to block out clean lines or sections if your design needs sharp edges. Be careful not to sketch too darkly onto light binders as the lines might still show up underneath your paint. Also remember – some masking tape will let paint through slightly, the lines will help as a guide, but won’t always give precise, clean lines.
Step 3: Mix Your Paints with Fabric Medium

This is crucial: mix every colour 1:1 with fabric medium.
Fabric medium helps the paint stay flexible, prevents cracking, and keeps the design washable. It will thin your paint, so you’ll need more layers, but your future self (and your binder) will thank you.
Step 4: Lay Down a Base Coat

If you’re going for a vibrant design, start with a white base layer — it helps the colours stay bright! Let each layer dry completely before adding another. For speed, use a hair dryer between coats (on low/medium heat).
Step 5: Add More Layers

This part can be a bit boring, but it’s worth it. Apply multiple coats of paint, letting each one dry before moving on. Use your hair dryer in between to speed up the process. The smoother the base, the better your final design will look.
Step 6: Paint Your Final Design

Now for the fun part — the top layer! Take your time adding in details, colours, and outlines. Remember:
- Light colours go first
- Darker colours layer on top
(It’s much easier to cover up light colours with dark ones rather than vice versa! Plus, then there’s no need to awkwardly try and avoid mixing the light colour with the dark outline by mistake and ending up with a gross muddy colour instead of what you really wanted)
Step 7: Heat Set the Design

Once you’re happy with your design, heat set your design using a hair dryer. This helps the paint bond to the fabric and stay in place when worn or washed. (⚠️ Do NOT use an iron — it can melt your binder and ruin your hard work!)
Washing & Care
Spot wash by hand when needed. The design should hold up well if you used fabric medium, but some fading is likely over time. Also be aware that there is always a risk that parts of the design will smudge if fully submerged in water, so be very careful and be prepared for touch-ups in future!
Dos & Don’ts
✅ Do:
- Mix paint with fabric medium 1:1 every time
- Apply multiple coats
- Sketch your design first
- Use a hair dryer to speed things up and heat set
- Trust the process — it won’t look perfect at first!
- Spot clean gently
❌ Don’t:
- Wear your favourite clothes while painting (paint stains are forever)
- Paint on a binder that you plan to wear daily
- Use an iron to heat set
- Skip the fabric medium — your paint will crack
- Layer light over dark — start light!
- Accidentally drink your paint water (not from experience or anything)
Happy painting, and don’t forget to take breaks, hydrate (not with paint water), and post your finished look online — we’d love to see it!